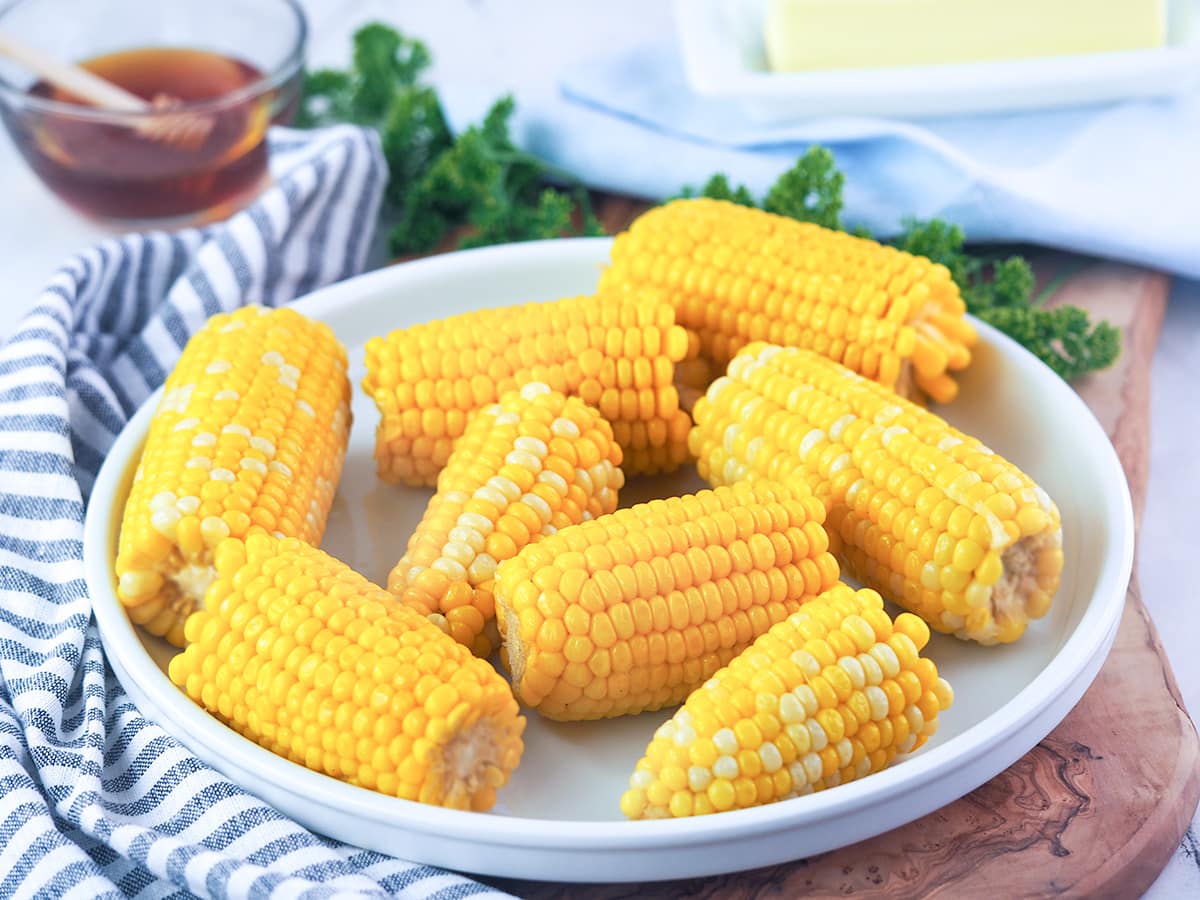
Milk Corn on the Cob


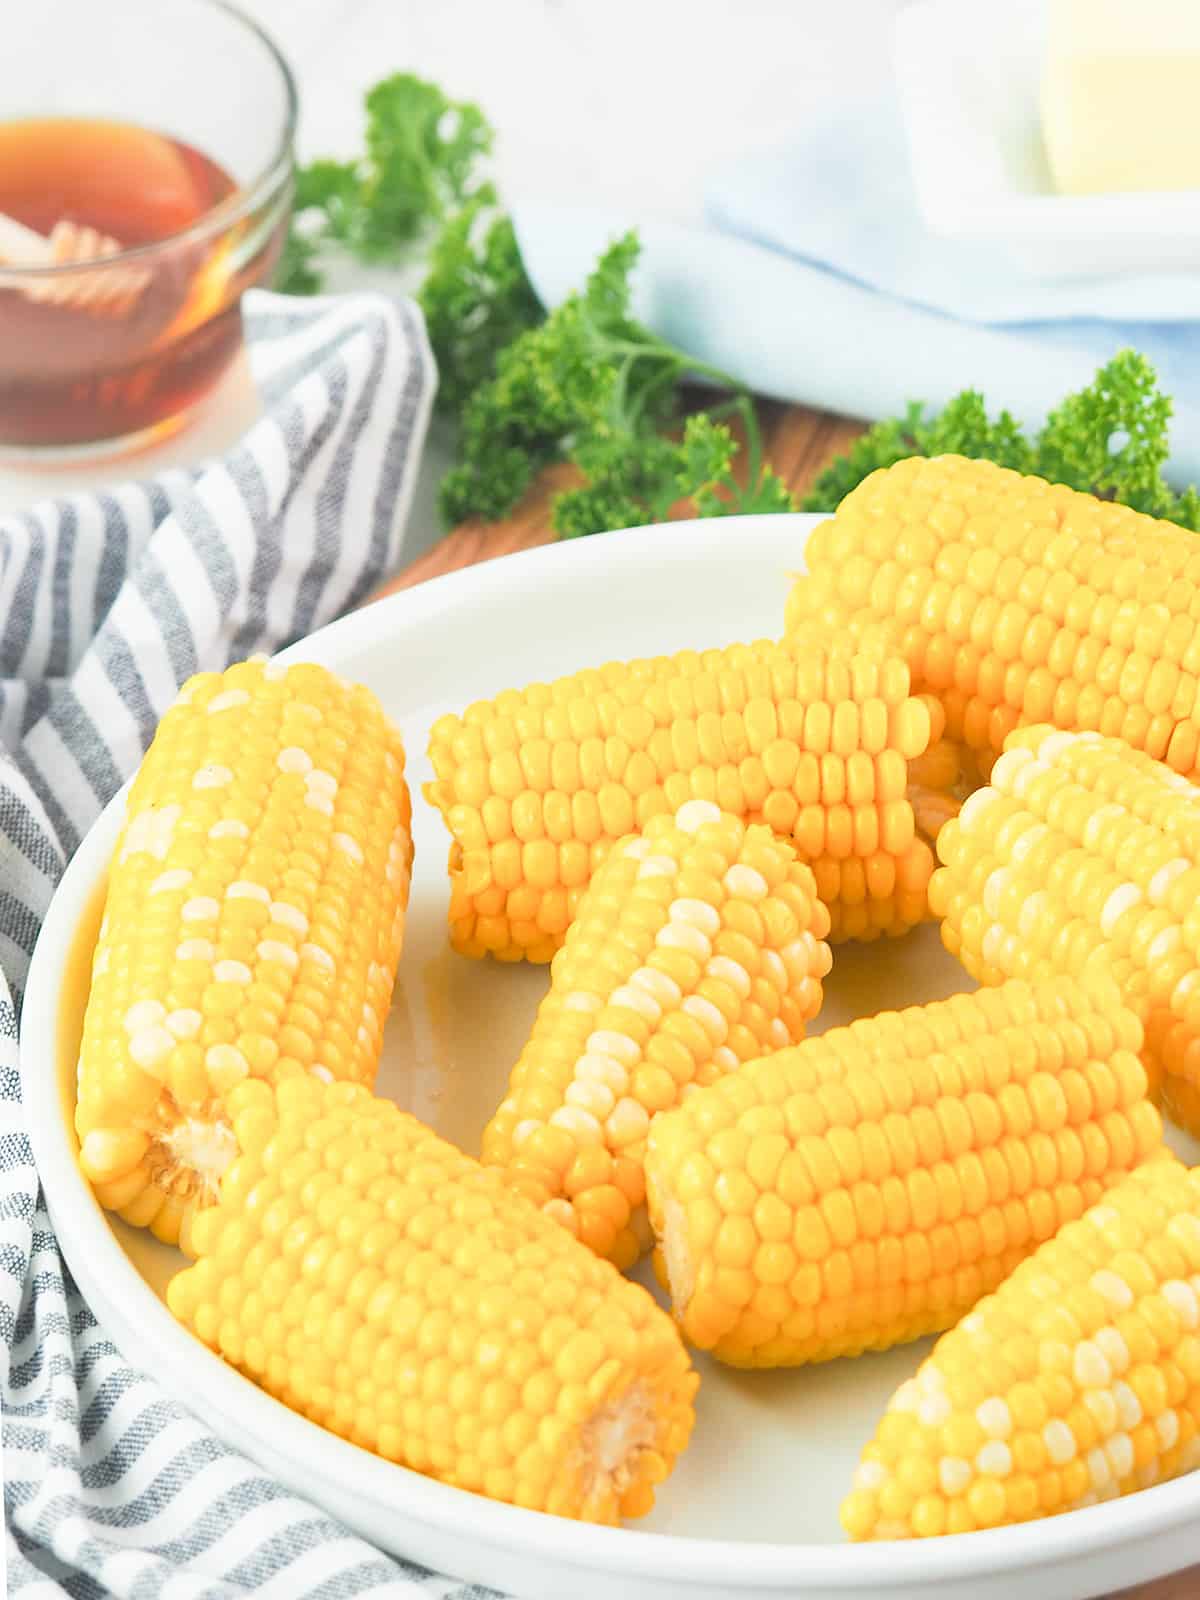
Milk Corn on the Cob is the BEST way to cook hands down to cook corn on the cob! Cooked in milk, butter, honey, and salt until it is a delish side dish with very little effort in your Instant Precision Dutch Oven.
Why this works
- Best way to cook fresh corn - this is hands down one of the best ways to cook corn on the cob other than making Instant Pot Corn on the Cob. This is a great way to cook the first corn of the season and what you might find at the farmer's market.
- Sweet and delicious - milk corn on the cob is amazingly sweet and simple to make. A lot like my perfect steamed broccoli!
- Make it your way - the beautiful thing about making this in the Instant Precision Dutch Oven is you can control how long you want it to cook in the delicious buttery golden honey liquid to your liking. Make sure to try out some Dutch Oven Roasted Potatoes too!
Ingredients you will need
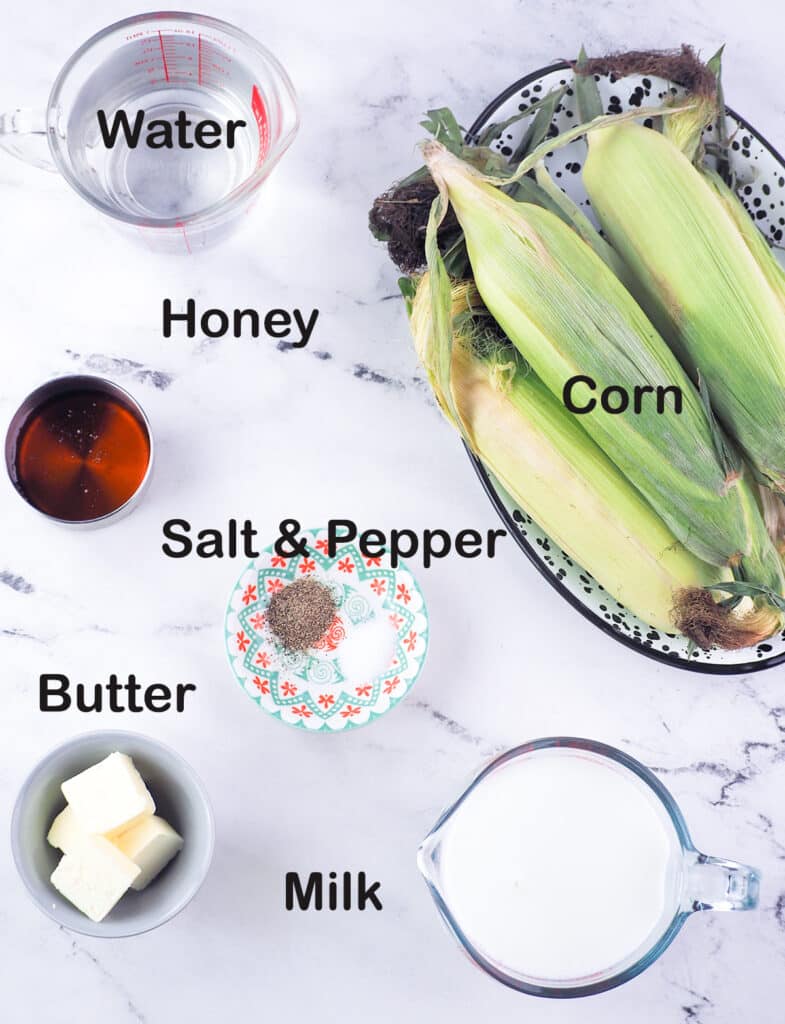
Here is a quick snapshot of the ingredients you'll need. Scroll down to the recipe card where you'll find exact measurements.
Ingredient notes
- Corn - choose corn husks that are bright green, wrapped tightly, and free of dampness. The tassels should be brown and sticky to the touch. This will tell you that the corn is fresh.
- Milk - can be full fat or reduce fat for this recipe, but should not be skim.
- Salt - is optional as this can possibly toughen the corn but I like to add it.
How to make this
Remove the husks and silks from the ears of corn. Leave them whole or break them in half. Set aside.
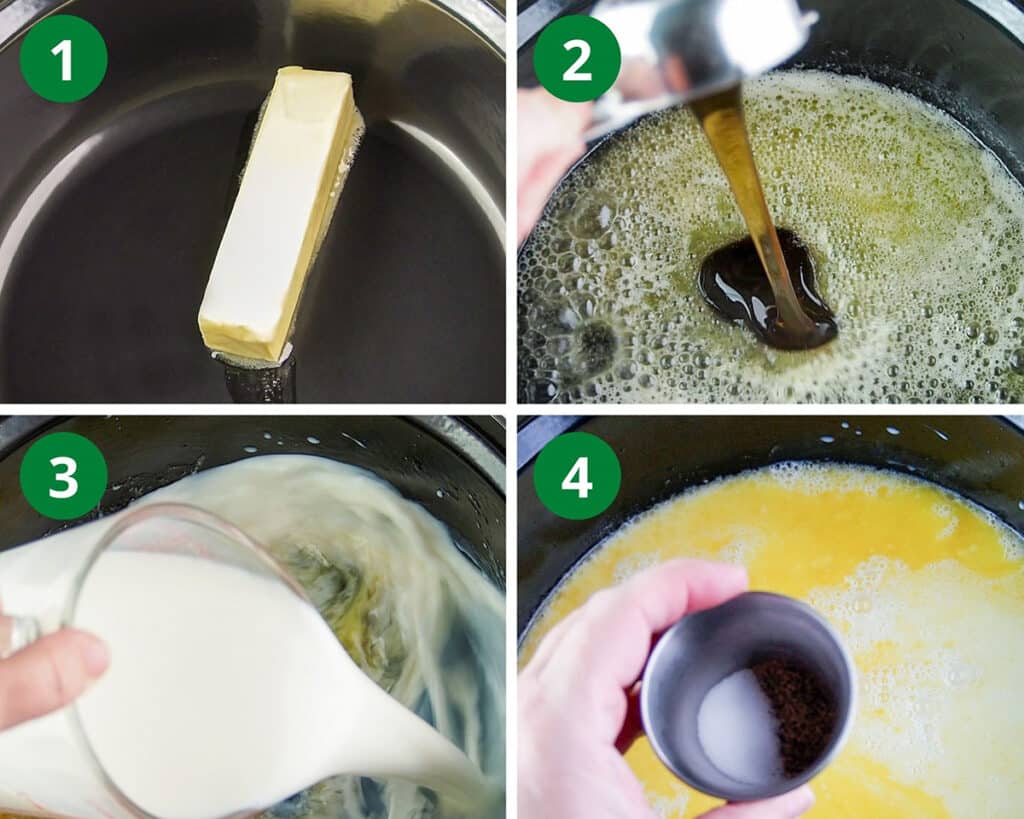
Set the Instant Precision Dutch Oven to the sear/saute settings. Once preheated melt the butter. Turn off the sear/saute and whisk in the honey, milk, salt, and pepper.
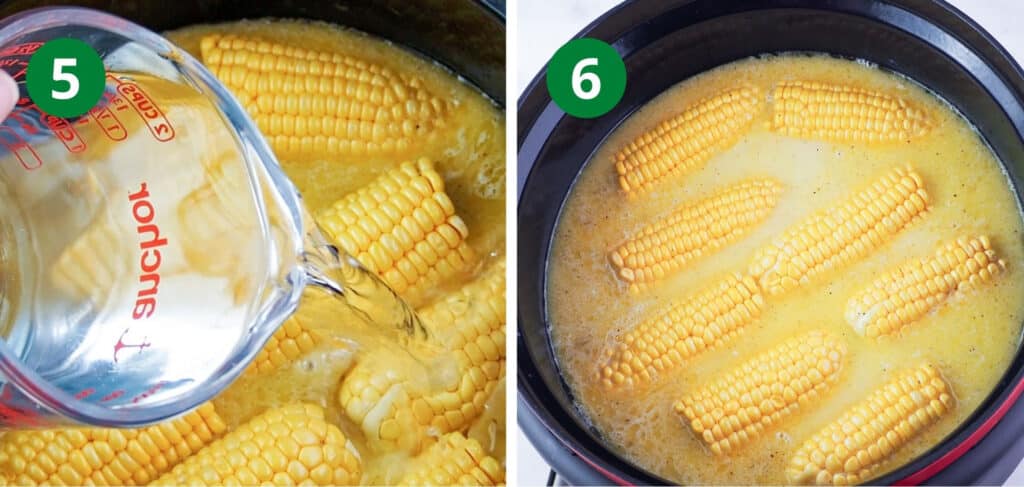
Place the corn in the Dutch oven, and add the water. Set to Manual Mode 2 at 220-degrees for one-hour.
Expert tips
Be sure not to leave your corn sitting in the cooking liquid for more than 10-minutes either before or after cooking. You can cook this for 45-minutes as well if you like crisper corn.
FAQs
Cooking corn on the cob in milk will bring out the sweetness of the corn, especially for sweet corn.
When it's fully cooked the corn will be a more brightly colored and intense yellow. The kernels will have an appearance that is plumper and more tender.
Pierce the kernels with a small knife. They should be tender and pierce very easily.
Serving suggestions
Serve this milk corn on the cob with ribs or as a side with baked potatoes. You can go with the classic butter and salt toppings or try something different. Try some of these below.
- Mexican-style - chili powder, cotija cheese, cilantro, and lime juice.
- Basil-Parmesan - some fresh basil or pesto with a sprinkling of Parmesan cheese.
- Bacon - BBQ - brush with your favorite BBQ sauce and sprinkle with some bacon bits.
- Garlic butter - DIY some garlic butter to melt and brush on.
Storage & reheating
Store in an airtight storage bag or container for up to one week. Reheat at 30-second intervals until warm to your liking.
The cooked milk corn on the cob can be frozen whole by wrapping each cob in plastic wrap and then stored in a plastic bag. The kernels can also be cut off and then frozen. This can be frozen for up to 3 to 6 months. Thaw in the refrigerator or cook in boiling water for 6-8 minutes.
How-to video
More side dish recipes


Did you try this recipe? Why not leave a star rating and/or a review in the comment section below to tell us about it! I always love hearing your feedback. Be sure to sign up for our email list, or follow us on Pinterest, Facebook, or Instagram!
Recipe
Milk Corn on the Cob

Equipment
Ingredients
- 4 ears corn sweet corn is best
- 2 cups milk whole or reduced fat, avoid skim
- ½ cup butter I used unsalted
- ¼ cup honey may use sugar or another sugar substitute
- ½ teaspoon salt optional in cooking liquid
- ½ teaspoon pepper
- 1 cup water
Instructions
- Remove husks and silks from the corn. Keep whole or break in half.
- Preheat the Instant Precision Dutch Oven to sear/saute. Add the butter and allow to melt.
- Turn off the sear/saute. Whisk in the honey, milk, water, salt (optional), and pepper. Add the corn on the cob to the Dutch oven.
- Cook on Manual Mode 2 at 220-degrees for one-hour. When done remove from pot.
- Serve immediately, or store in an airtight bag or container for up to one week.
- The corn on the cob can be frozen whole by wrapping each cob in plastic wrap then stored in a plastic bag. The kernels can also be cut off then frozen. This can be frozen for up to 3 to 6 months. Thaw in the refrigerator or cook in boiling water for 6-8 minutes.
Video
Notes
Don't forget to join our Facebook Group for Instant Pot and Air Fryer recipes!